

The process is straightforward: enter your website URL, customize the appearance, upload your logo, adjust the logo size, generate the QR code, review the preview, and then download it in your preferred format.
Basic Steps:
1. Enter Your Website URL (Link)
Start by locating the “Paste URL or Link (only)” field. Enter the complete website address you want people to visit after scanning your QR code.
For example:
https://yourwebsite.com 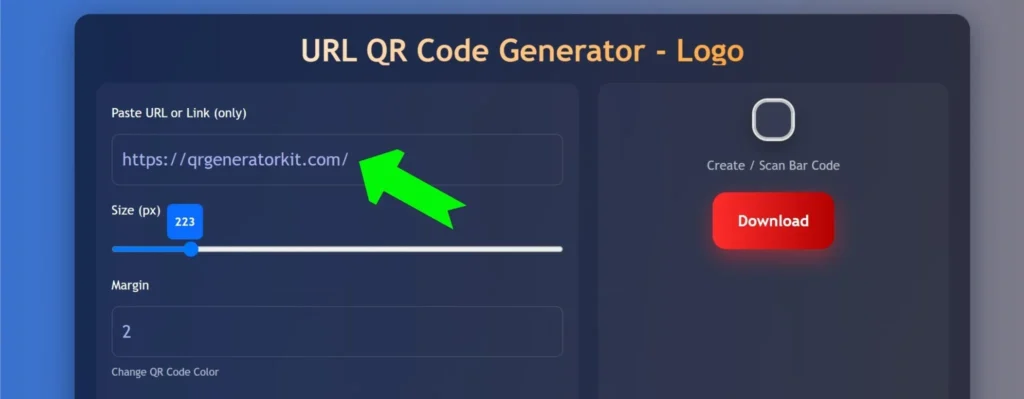
Make sure the URL is correct before generating the code because this is the website destination encoded into the QR code.
The tool is specifically designed for URL-based QR codes, so use a website or webpage address rather than ordinary text.
2. Set the Size, Margin and QR Colours
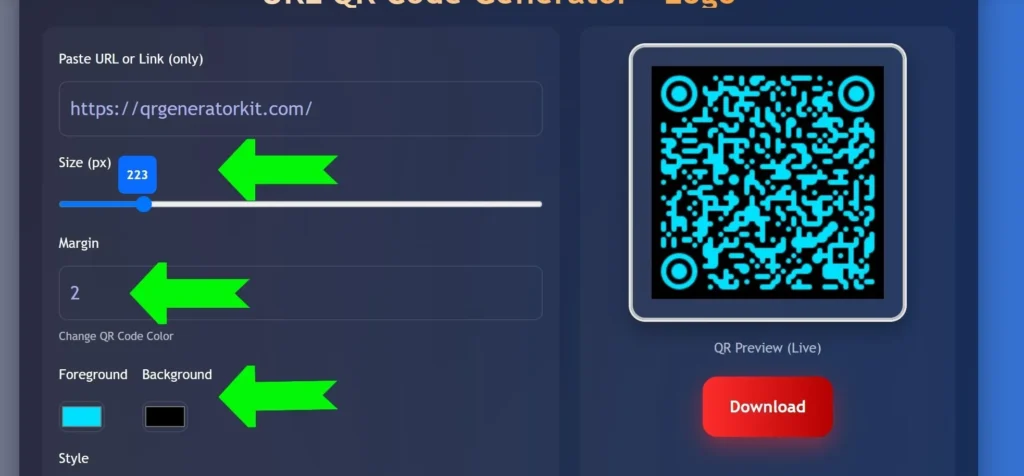
After entering your URL, you can customize the basic appearance of the QR code.
Size
The Size (px) slider lets you control the QR image dimensions. The available range is 150 to 600 pixels. Choose a size appropriate for where you intend to use the QR code.
Margin
The Margin field controls the space surrounding the QR pattern. This gives the QR code some separation from the edge of the image.
QR Pattern Colour and Background Colour
The Foreground and Background controls have different purposes.
- Foreground: This changes the visible QR pattern colour.
- Background: This changes the background colour behind the QR pattern.
For example, you can use a dark foreground with a light background. When experimenting with brand colours, maintain enough contrast so scanners can clearly distinguish the QR pattern.
3. Choose the QR Pattern and Angle Style
You can give the QR code a different visual appearance using the Style options.
Below are the QR Styles you can choose to edit:
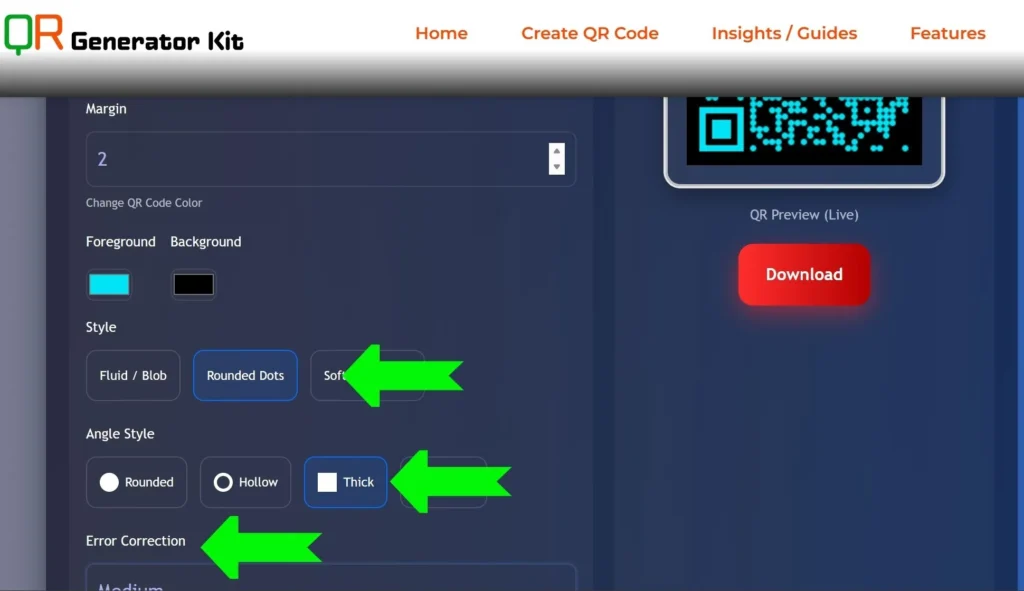
You can also edit the Angle Style and Corners, as indicated in the image above.
As shown in the previous image, the tool also provides four Error Correction options.
These options allow you to create a QR design that better matches your branding while retaining the underlying QR functionality.
4. Upload Your Logo
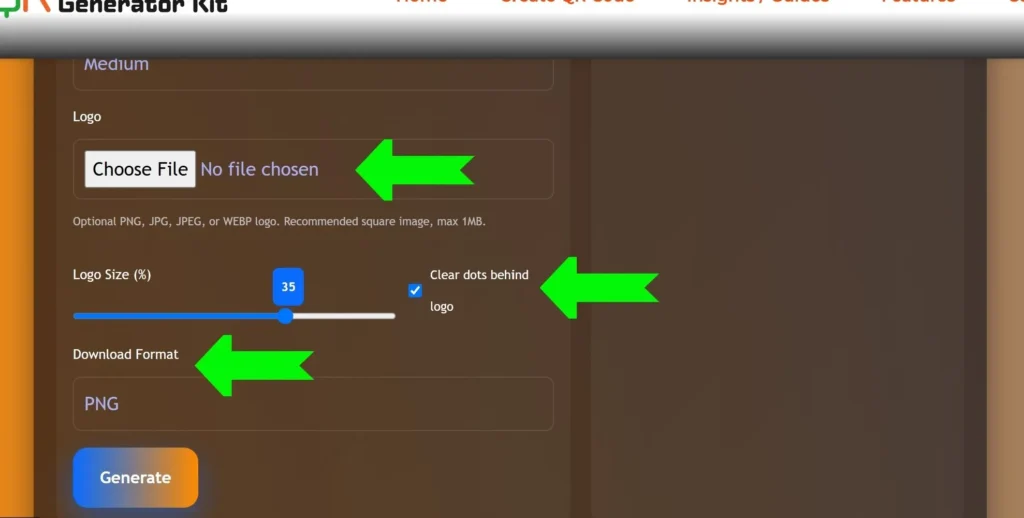
To brand the QR code, go to the Logo section and upload your image.
The tool accepts:
- PNG
- JPG
- JPEG
- WEBP
A square logo is recommended, with a maximum file size of 1 MB.
After selecting the file, the tool displays a small logo preview so you can confirm that the correct image has been uploaded.
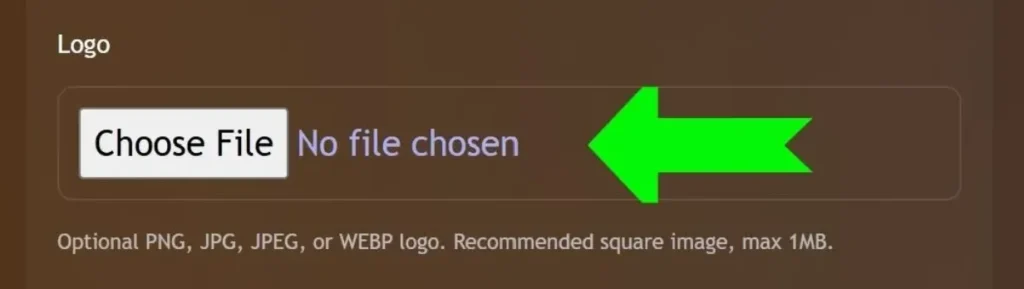
How to upload and position a logo inside a URL QR code generator?
Upload your logo through the Logo field and then use the Logo Size (%) control to determine how much space it occupies inside the QR design. The tool automatically places the logo within the QR code; there is no manual drag-and-drop positioning control.
Adjust Logo Size and Clear the Dots
Once your logo is uploaded, you can control its size using Logo Size (%).
The available range is 15% to 45%.
There is also a “Clear dots behind logo” option. It is enabled by default and removes the QR pattern underneath the logo area, giving the center a cleaner appearance.
This is also the basic answer to how to create qr code with logo in the middle: enter your URL, upload the logo, adjust its size, and generate the QR code.
5. Review the Preview Area (In Real Time)
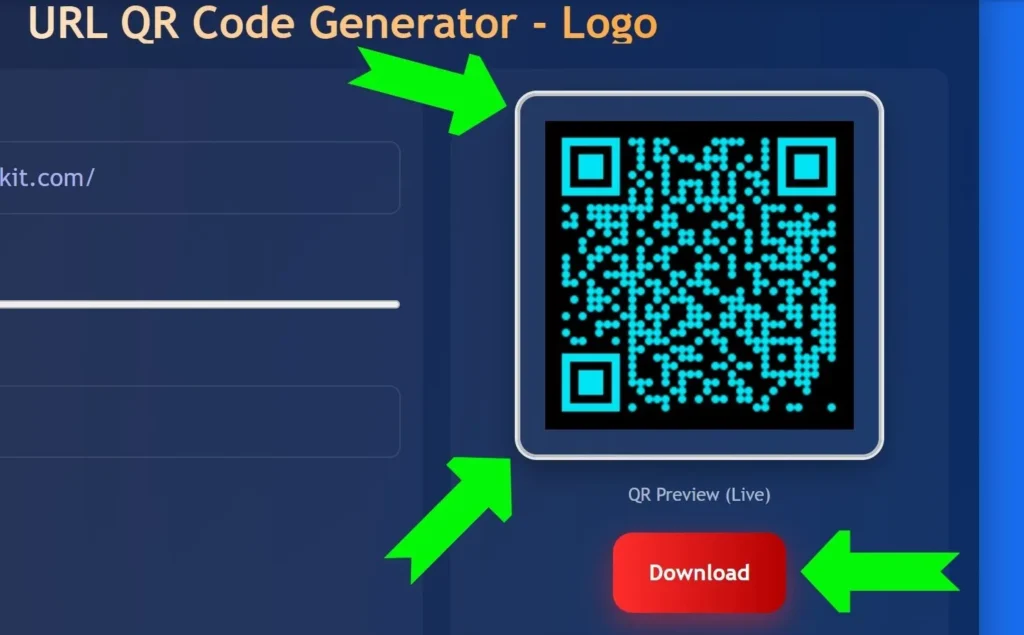
Before downloading, look at the Preview area on the right side of the tool.
The preview is labeled “QR Preview (Live)” and displays the generated QR code. Use this area to visually check your:
- QR pattern
- Foreground color
- Background color
- Logo
- Logo size
- Overall design
This step is useful because it lets you see the result before saving the final QR code.
6. Click Generate Button before Downloading
When all your settings are ready, click the “Generate” button before downloading.
This step is important: the displayed QR code should be generated before you download and use the final QR code.
Finally, click “Download” to save the generated QR code.
